# Setup
The MoonPay Wallets REST API provides programmatic access to authentication and user management functionality. Use the API to verify tokens issued by MoonPay Wallets, look up authenticated users, and run server-side operations from your backend.
To create and configure apps programmatically, use [organization API keys](/get-started/rest-api/organization-api-keys) and follow [Provision apps from your backend](/get-started/rest-api/provision-apps).
## Prerequisites
Before you begin, make sure you have:
* [Created a MoonPay Wallets app](/get-started/dashboard/create-new-app) in the dashboard
* Obtained your API keys from the dashboard
## Base URL
All requests to the MoonPay Wallets API must be made to the following base URL:
```
https://x-api.moonpay.com
```
All endpoints are versioned under `/v0`.
**HTTPS is required for all requests.** HTTP requests will be rejected.
## Authentication
### API Keys
MoonPay Wallets provides two types of runtime app keys:
| Key Type | Format | Usage | Security |
|----------|--------|-------|----------|
| **Secret Keys** | `moon_sk_test_...` / `moon_sk_live_...` | Server-side requests | Keep secure, never expose in client code |
| **Publishable Keys** | `moon_pk_test_...` / `moon_pk_live_...` | Browser/SDK requests | Safe to expose in client-side code |
Use test keys (`moon_sk_test_...`) for development and testing, and live keys (`moon_sk_live_...`) in production.
Never share your secret API keys in publicly accessible areas such as GitHub, client-side code, or browser developer tools. Always use environment variables to store your keys.
### Authentication Headers
Each key type is sent in a different header:
**Secret keys** are sent in the `X-API-Key` header:
```
X-API-Key: moon_sk_test_your_api_key
```
**Publishable keys** are sent in the `Authorization` header using the `PublicToken` scheme (this is what the SDK does for you automatically):
```
Authorization: PublicToken moon_pk_test_your_api_key
```
### Required Headers
App secret-key requests use these headers. Organization management requests instead use `Authorization: Bearer` with an organization key.
Your MoonPay Wallets secret API key (test or live).
Example: `moon_sk_test_your_api_key`
Set to `application/json` for all requests with a body.
## Getting Your API Keys
Retrieve your API keys from the MoonPay Wallets Dashboard:
1. Log in to your [MoonPay Wallets Dashboard](https://dashboard.moonx-dev.com)
2. Select your app from the dropdown
3. Navigate to **API Keys** in the sidebar
4. Copy your test or live API key
5. Store it securely in your environment variables
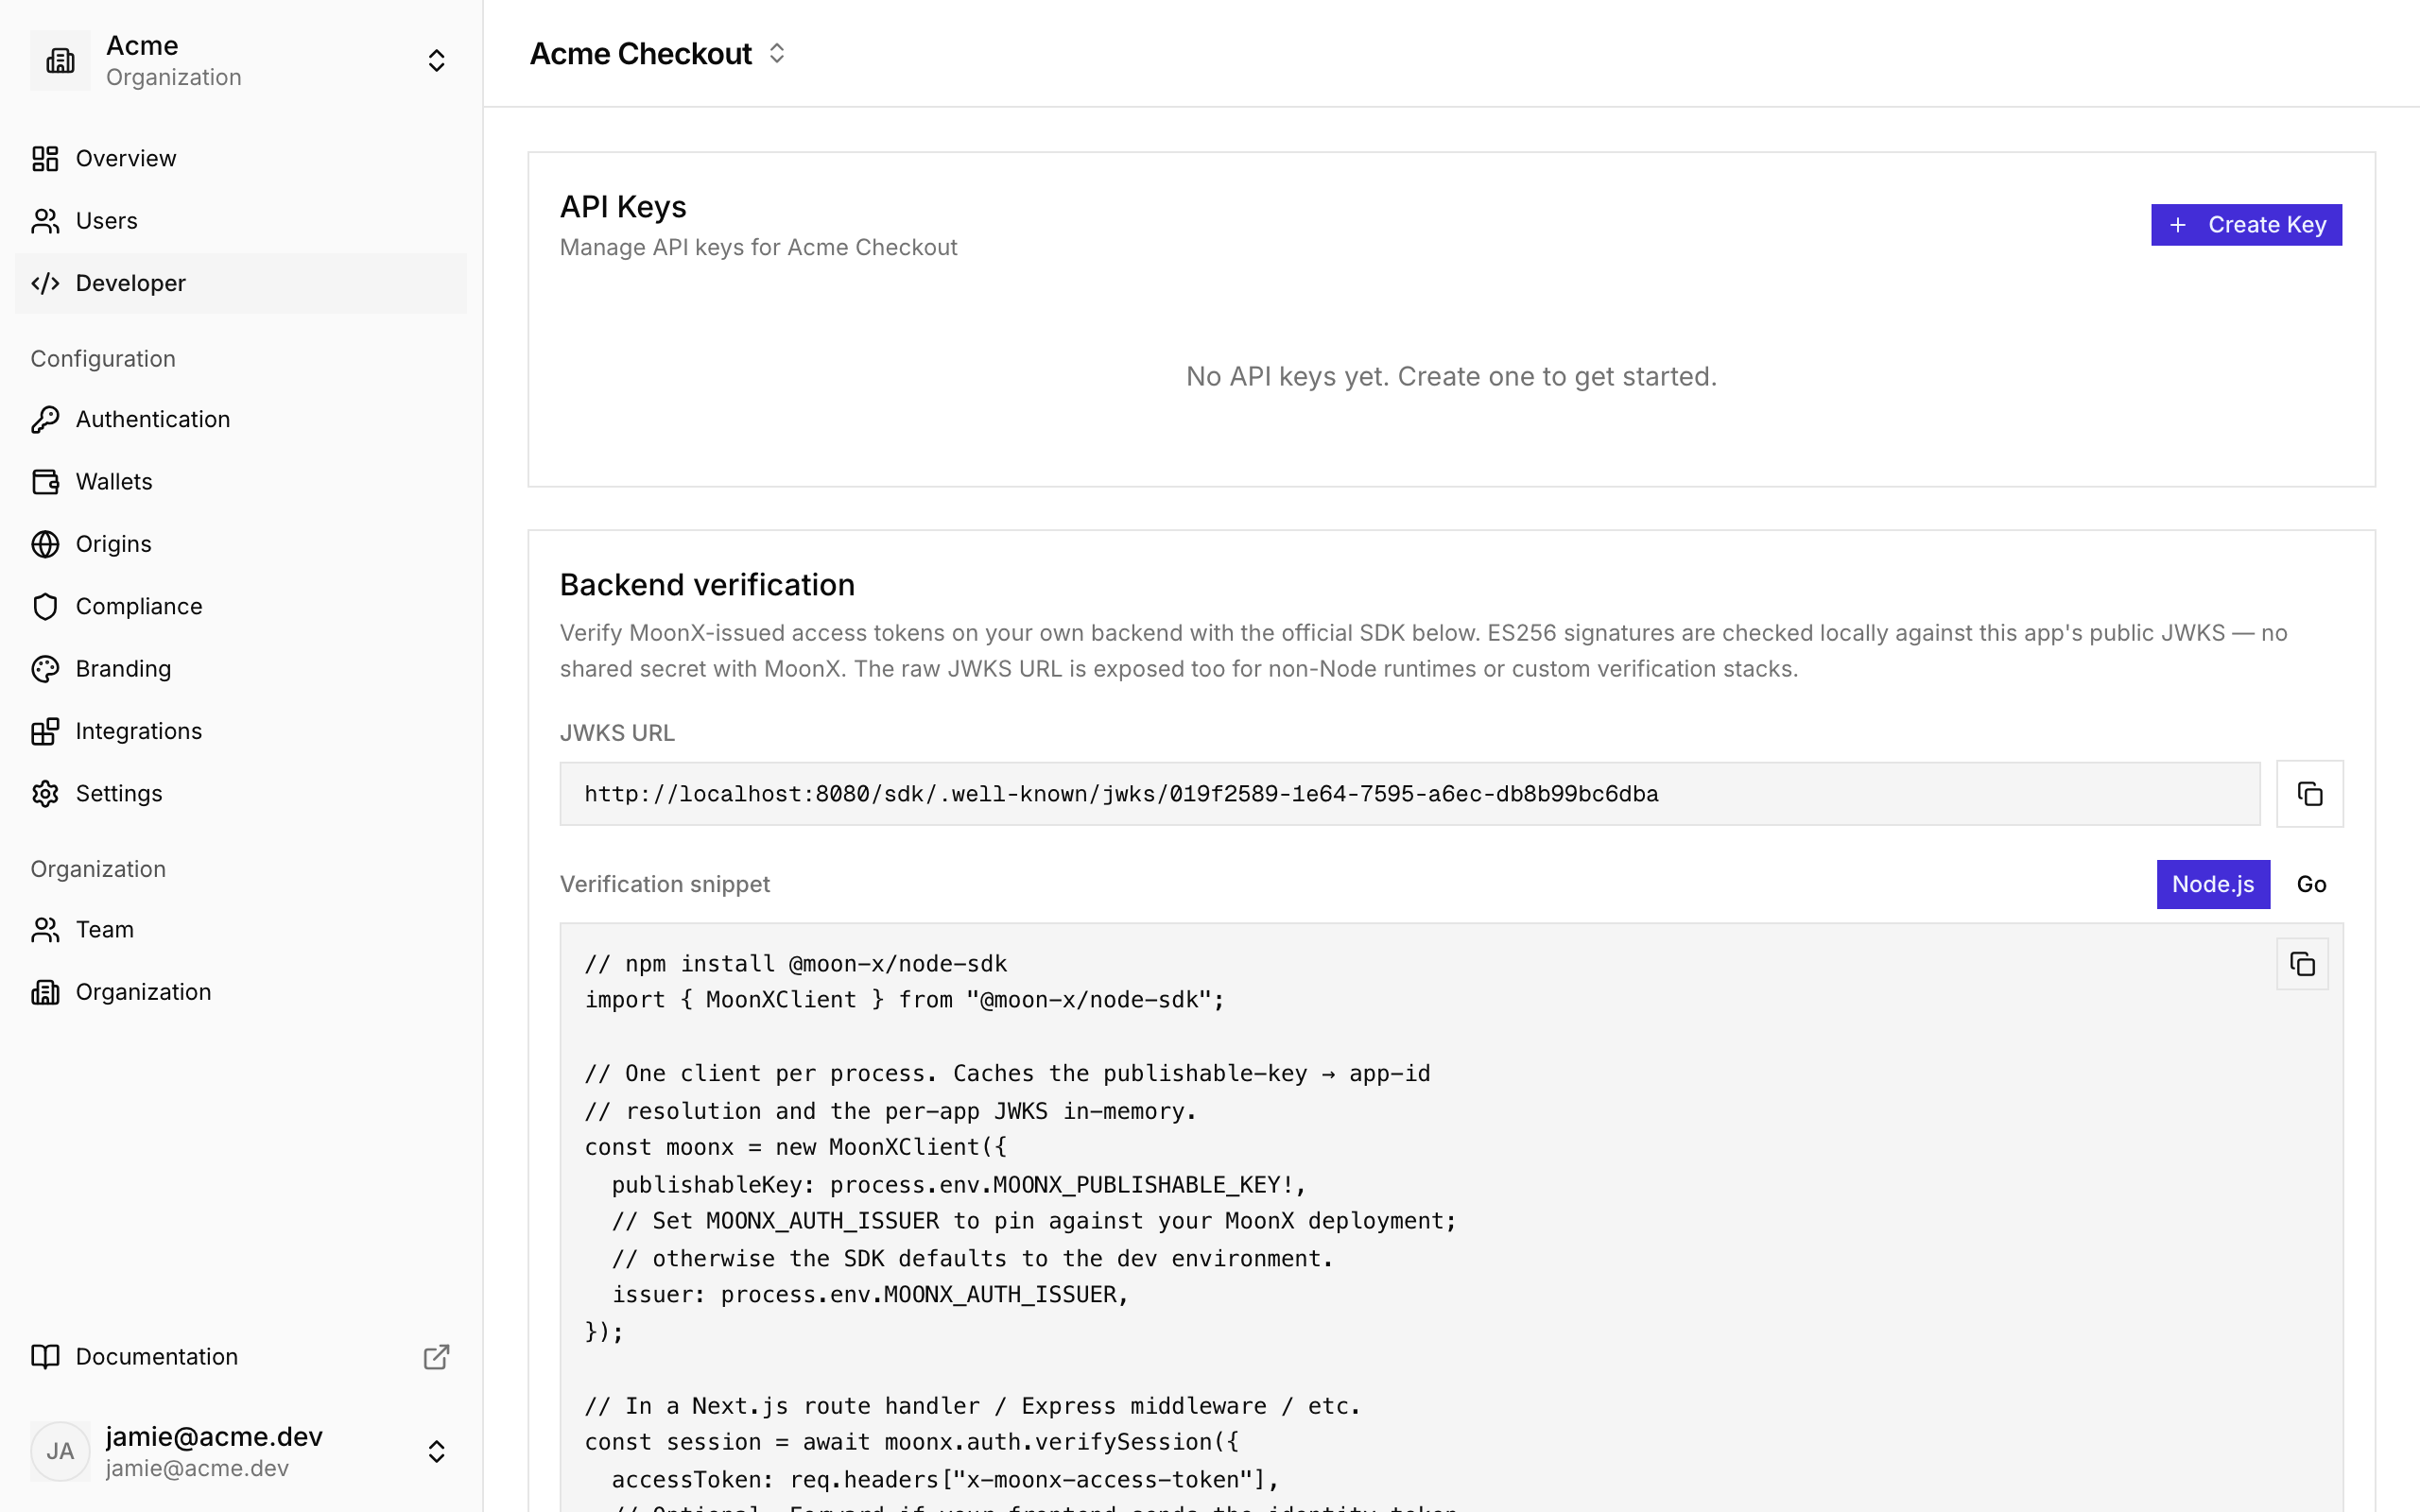
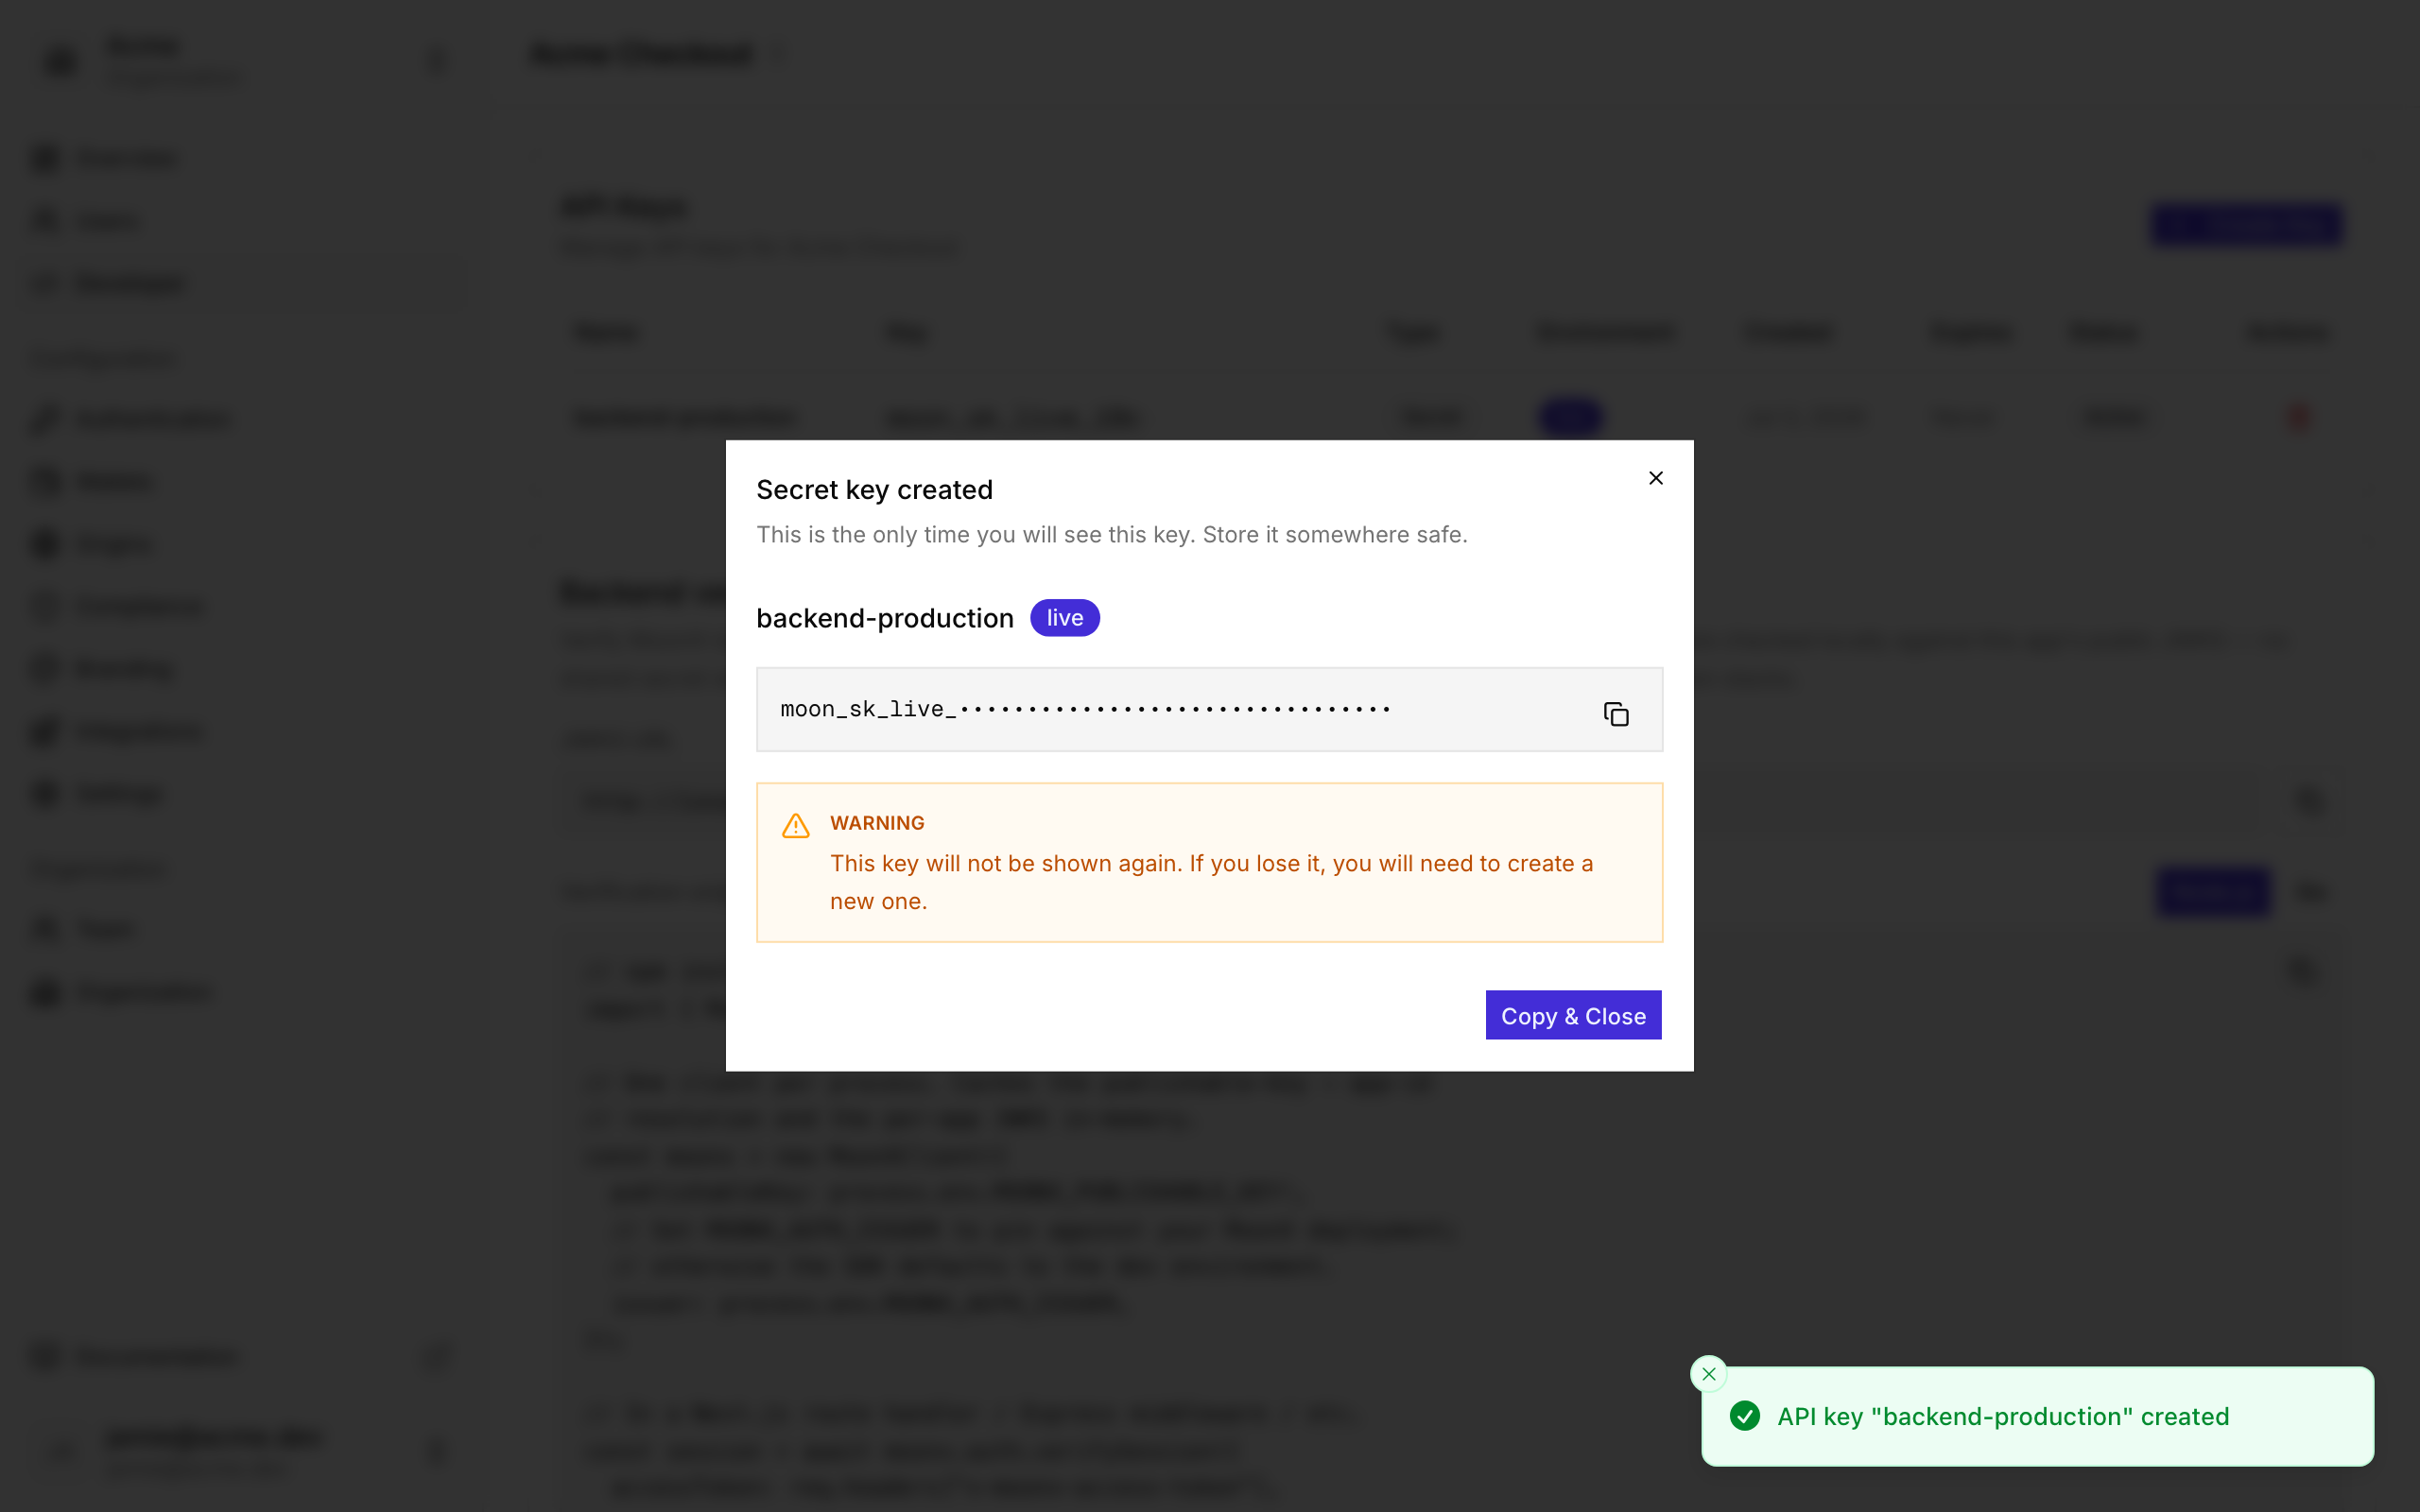 Start with test keys during development. Switch to live keys only when you're ready to go to production.
## Example Requests
A good first request is fetching your app's JSON Web Key Set (JWKS). This endpoint is public (no API key required) and returns the keys your backend uses to verify access and identity tokens issued by MoonPay Wallets:
```bash
curl -X GET "https://x-api.moonpay.com/v0/sdk/.well-known/jwks/your_app_id" \
-H "Content-Type: application/json"
```
```javascript
const response = await fetch(
'https://x-api.moonpay.com/v0/sdk/.well-known/jwks/your_app_id'
);
const jwks = await response.json();
console.log(jwks);
```
```javascript
const axios = require('axios');
const response = await axios.get(
'https://x-api.moonpay.com/v0/sdk/.well-known/jwks/your_app_id'
);
console.log(response.data);
```
```python
import requests
url = "https://x-api.moonpay.com/v0/sdk/.well-known/jwks/your_app_id"
response = requests.get(url)
jwks = response.json()
print(jwks)
```
```go
package main
import (
"fmt"
"io"
"net/http"
)
func main() {
resp, _ := http.Get("https://x-api.moonpay.com/v0/sdk/.well-known/jwks/your_app_id")
defer resp.Body.Close()
body, _ := io.ReadAll(resp.Body)
fmt.Println(string(body))
}
```
Responses from this endpoint are cacheable (`Cache-Control: public, max-age=300`), so your backend picks up key rotations within minutes.
## Making Authenticated Requests
Secret-key endpoints require the `X-API-Key` header. For example, the compliance API lets your backend blacklist one of your app's users:
```bash
curl -X POST "https://x-api.moonpay.com/v0/compliance/users/blacklist" \
-H "X-API-Key: moon_sk_test_your_api_key" \
-H "Content-Type: application/json" \
-d '{
"user_id": "b7f9c2e4-1234-4d56-8abc-9f0e1d2c3b4a",
"reason": "chargeback fraud review"
}'
```
```javascript
const apiKey = process.env.MOONX_SECRET_API_KEY;
const response = await fetch('https://x-api.moonpay.com/v0/compliance/users/blacklist', {
method: 'POST',
headers: {
'X-API-Key': apiKey,
'Content-Type': 'application/json'
},
body: JSON.stringify({
user_id: 'b7f9c2e4-1234-4d56-8abc-9f0e1d2c3b4a',
reason: 'chargeback fraud review'
})
});
const data = await response.json();
console.log(data);
```
```python
import requests
import os
api_key = os.environ.get('MOONX_SECRET_API_KEY')
url = "https://x-api.moonpay.com/v0/compliance/users/blacklist"
headers = {
"X-API-Key": api_key,
"Content-Type": "application/json"
}
payload = {
"user_id": "b7f9c2e4-1234-4d56-8abc-9f0e1d2c3b4a",
"reason": "chargeback fraud review"
}
response = requests.post(url, json=payload, headers=headers)
data = response.json()
print(data)
```
The app is resolved from your API key, so you never pass an app ID, a secret key can only act on its own app's users.
## Acting on Behalf of a User
Some endpoints operate on the currently authenticated end user rather than your app. These take a publishable key plus the user's access token (obtained by the SDK after login) in the `X-MoonX-Access-Token` header:
```bash
curl -X GET "https://x-api.moonpay.com/v0/sdk/auth/users/public/me" \
-H "Authorization: PublicToken moon_pk_test_your_api_key" \
-H "X-MoonX-Access-Token: {user_access_token}"
```
## Environment Variables
Store your API keys securely using environment variables:
```bash [.env]
# Never commit this file to version control!
MOONX_SECRET_API_KEY=moon_sk_test_your_api_key
```
**Loading environment variables:**
```javascript
// Using dotenv package
require('dotenv').config();
const apiKey = process.env.MOONX_SECRET_API_KEY;
```
```python
# Using python-dotenv package
from dotenv import load_dotenv
import os
load_dotenv()
api_key = os.environ.get('MOONX_SECRET_API_KEY')
```
```javascript
// Next.js automatically loads .env.local files
// Use NEXT_PUBLIC_ prefix only for client-side variables
const apiKey = process.env.MOONX_SECRET_API_KEY;
```
## Response Format
All API responses are returned in JSON format with consistent structure:
### Success Response
```json
{
"app_id": "b2c3d4e5-6789-4abc-9def-0123456789ab",
"user_id": "b7f9c2e4-1234-4d56-8abc-9f0e1d2c3b4a",
"blacklisted": true
}
```
### Error Response
```json
{
"error": "user_id is required"
}
```
## HTTP Status Codes
The MoonPay Wallets API uses standard HTTP status codes:
| Status Code | Meaning |
|-------------|---------|
| `200` | Success - Request completed successfully |
| `400` | Bad Request - Invalid request parameters |
| `401` | Unauthorized - Invalid or missing API key |
| `403` | Forbidden - API key doesn't have required permissions |
| `404` | Not Found - Resource doesn't exist |
| `429` | Too Many Requests - Rate limit exceeded |
| `500` | Internal Server Error - Something went wrong on our end |
## Rate Limiting
The MoonPay Wallets API rate limits requests per IP to ensure service reliability. When you exceed the rate limit, you'll receive a `429` status code.
Implement exponential backoff when you receive rate limit errors to ensure your application handles limits gracefully.
## Best Practices
### Security
* **Never expose secret API keys in client-side code** - Secret keys should only be used from your backend; use publishable keys in the browser
* **Use environment variables** - Store keys in `.env` files and never commit them to version control
* **Rotate keys regularly** - Generate new keys periodically and revoke old ones
* **Use test keys in development** - Keep live keys separate and only use them in production
### Error Handling
Always implement proper error handling:
```javascript
try {
const response = await fetch('https://x-api.moonpay.com/v0/compliance/users/blacklist', {
method: 'POST',
headers: {
'X-API-Key': apiKey,
'Content-Type': 'application/json'
},
body: JSON.stringify({ user_id: userId, reason: 'fraud review' })
});
if (!response.ok) {
const error = await response.json();
throw new Error(error.error);
}
const data = await response.json();
return data;
} catch (error) {
console.error('API request failed:', error.message);
// Handle error appropriately
}
```
## Testing Your Integration
Test your API integration with these steps:
1. **Use test API keys** - Start with `moon_sk_test_...` keys
2. **Test connectivity** - Fetch your app's JWKS to confirm your app ID is correct
3. **Test authentication** - Verify your secret key works against a secret-key endpoint
4. **Handle errors** - Test error scenarios (invalid keys, missing parameters, etc.)
5. **Check rate limits** - Ensure your application handles rate limiting properly
## Next Steps
Now that you've set up API authentication, explore the available endpoints:
Manage user authentication and sessions
Make your first API requests
Create wallets and sign transactions from your app
Verify user sessions on your backend
## Support
Need help with the REST API?
* Check the [API Reference](/api-reference) for detailed endpoint documentation
* Review [code examples](/recipes/overview) for common patterns
* Contact support for technical assistance